Reverse Glass Gilding
Published on 24.06.2020 by Rachel
Published on 24.06.2020 by Rachel
I’m so excited to finally have a reverse glass gilding tutorial!
Here at Handover, we get asked a lot about the process of reverse glass gilding, Jay Holland, more often known as Greater Opacity, has created this tutorial to de-mystify the process and to answer some of the most commonly asked questions.
You can see more of Jay's work on his Instagram, and he is also a member of Alphabetics Anonymous, a sign painting collective that paints together and is at the heart of providing a support network for signwriters and lettering artists.
Reverse glass gilding is a process with a lot of variables and so getting a good gild takes patience and skill, thankfully Jay has plenty of those and has shared his method below!
Things you need for water gilding:
Glass panel/window
Genuine loose gold leaf (12 to 24 carat)
Deionised or distilled water
Gelatine capsules
Heat source
Cleaning cake/powder
Cloth
Paper towel
Cotton wool
Gilders tip
Soft haired brush
Back up paint & thinner
Signwriting brush
Patience!
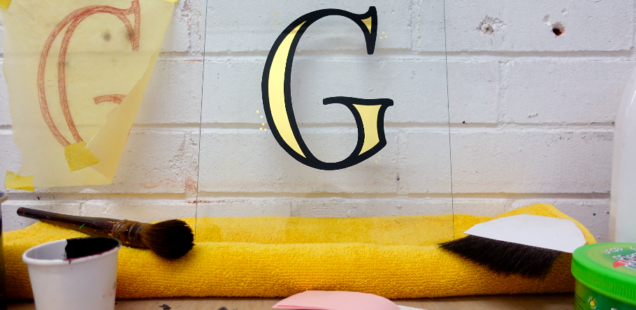
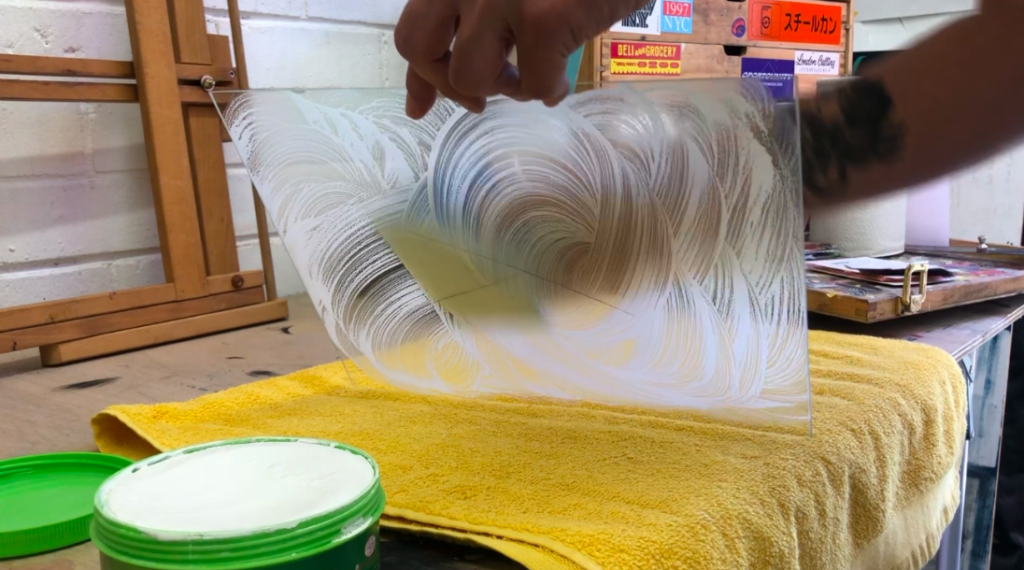
STEP ONE: Clean the glass.
Use a damp cloth with some cleaning agent such as Pierre d’Argent (it has a very fine powder like texture) and wipe over the surface until covered.
Let dry, then remove with a dry cloth or paper towel.
REPEAT! And then repeat again! You can test the area is clean enough by brushing some of your distilled or deionised water over the surface – if it falls in an even sheet you’re good to go and you can wipe it dry.
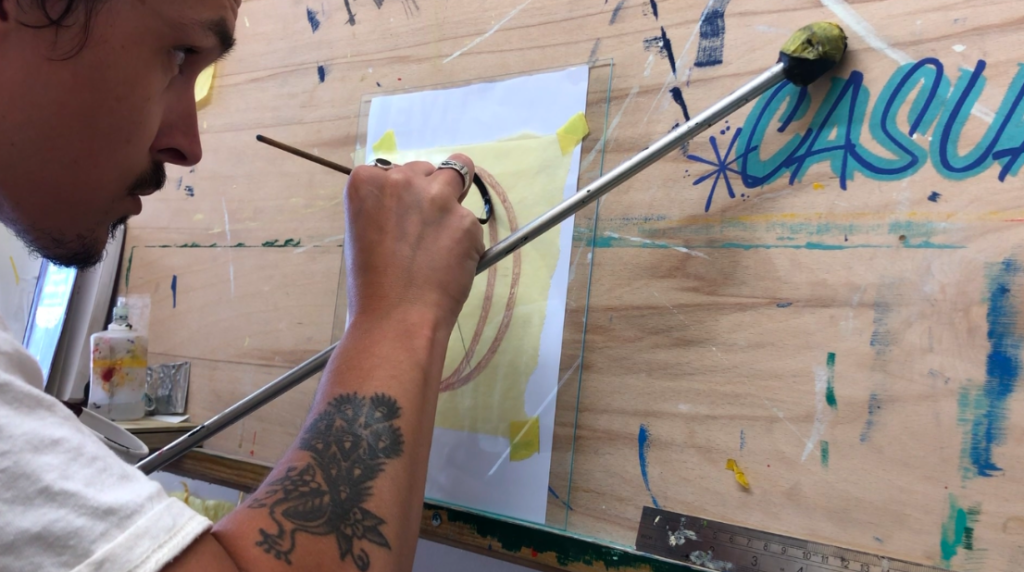
STEP TWO: Outlines
For painting outlines (and backup later) Nazdar back up black paint is most often used- it dries fast and sets hard. It’s sold in screen printing consistency so needs to be thinned with white spirit/turps for painting. Even consistency of the paint is key here, as it needs to be able to withstand cleaning later on in the process. Whilst this dries you can make up your water size.

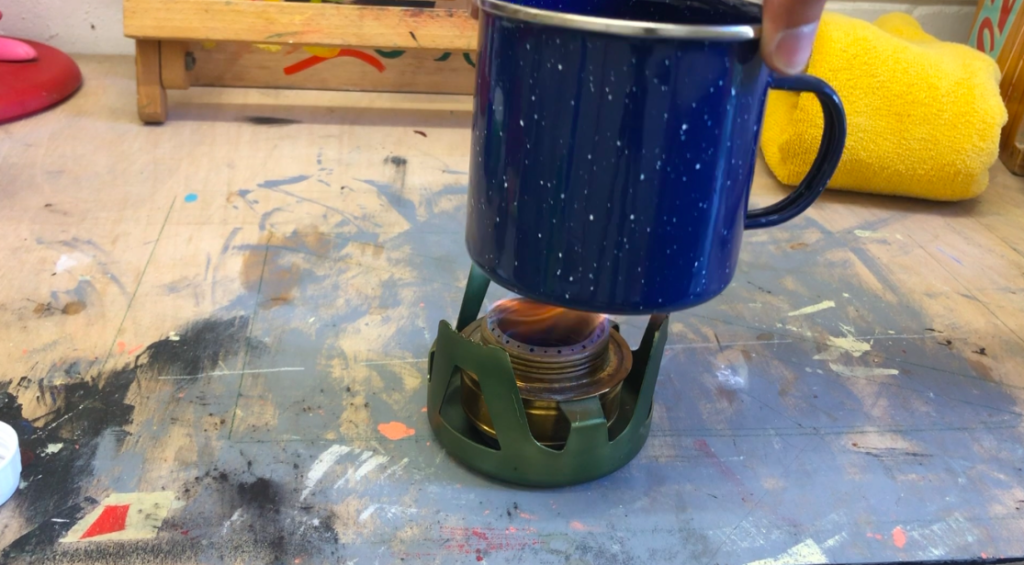
STEP THREE: Size
Water size is made up of deionised or distilled water and gelatine, with a ratio of 2 ‘00’ capsules to a pint. Heat the water enough to be able to melt the gelatine and stir until fully dissolved. Deionised or distilled water is used as it has been treated to remove any minerals or impurities, so once its evaporated it leaves nothing behind on the glass resulting in a clearer finish when gilding.
STEP FOUR: Gilding, the fun tricky bit!
Using a soft-haired brush, apply your water size over the area you wish to gild – it should flow evenly down the surface. Whilst it's wet it's ready to receive the gold leaf.
To pick up the leaf you first ‘charge’ the gilding tip by quickly running it through your hair, or behind your ear, transferring a small amount of oil to the hairs of the brush, which, once pressed to the leaf, will pick it up. You can then transfer the leaf from the brush to the glass, by holding it perpendicular to the surface. Once the brush is within a few millimetres of the glass, the leaf will be sucked from the brush to the surface of the glass.
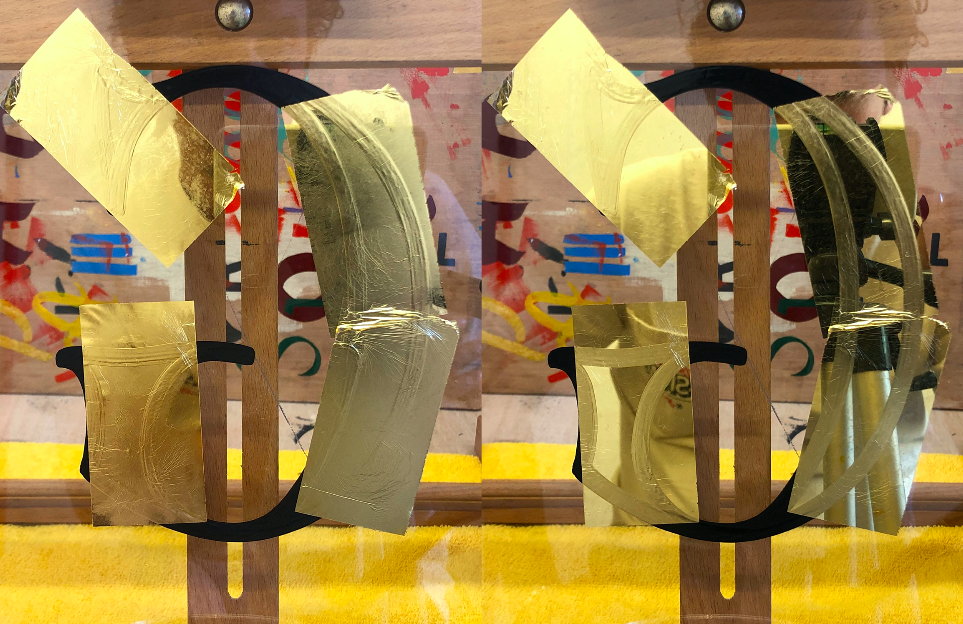
Repeat this process until you have covered the desired area, slightly overlapping each leaf as you go. You will need to re-apply the size throughout.
Be patient and go slow with it! Your aim is to get the leaf on the glass as flat as possible, with as minimal wrinkles as possible. It’s tricky but with practice, you’ll get the hang of it.
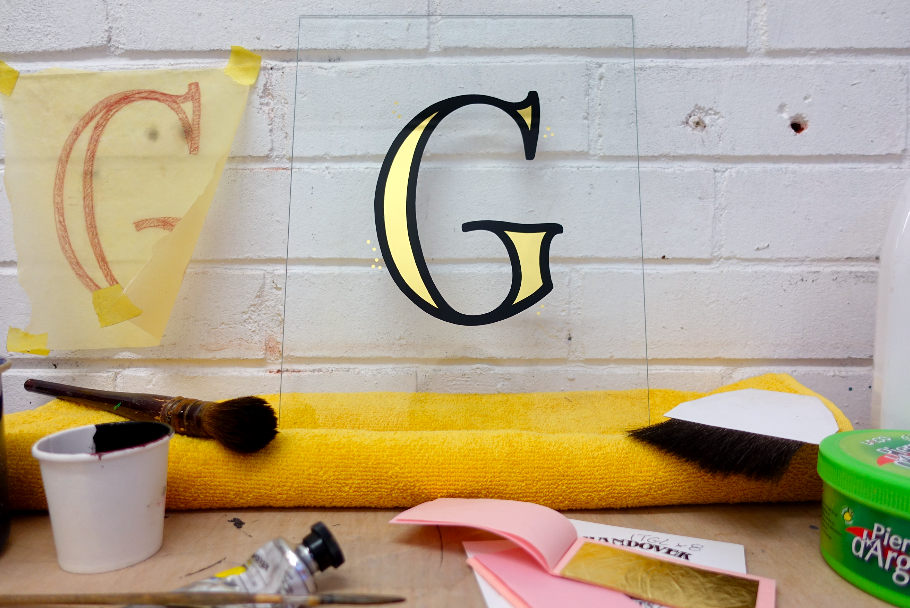
To aid ease of use and application, especially for letters of this size, I cut the book of gold leaf in half with a ruler pressed on the book, and a clean sharp Stanley knife.
This way the leaf fits the size of the brush, and there’s less chance of it wrinkling so much on the glass. If you’re not comfortable doing this you can use a gilding pad and gilders knife to cut the leaf, or go with full size leaves out the book.
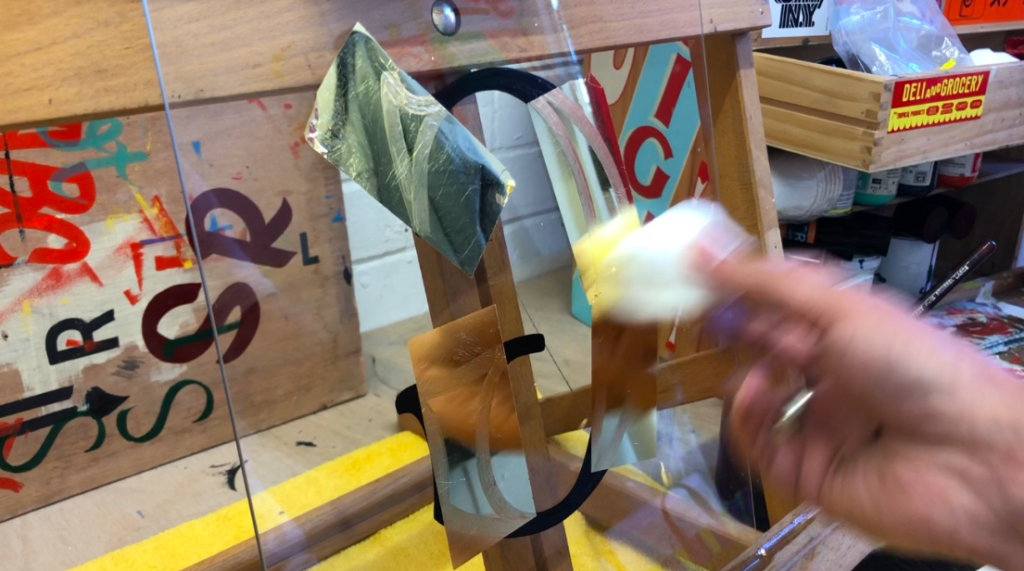
STEP FIVE; Burnishing
Once the size has dried completely (drying time will differ depending on temperature of the room/glass) and the gold leaf has turned to a mirror finish you can burnish the leaf.
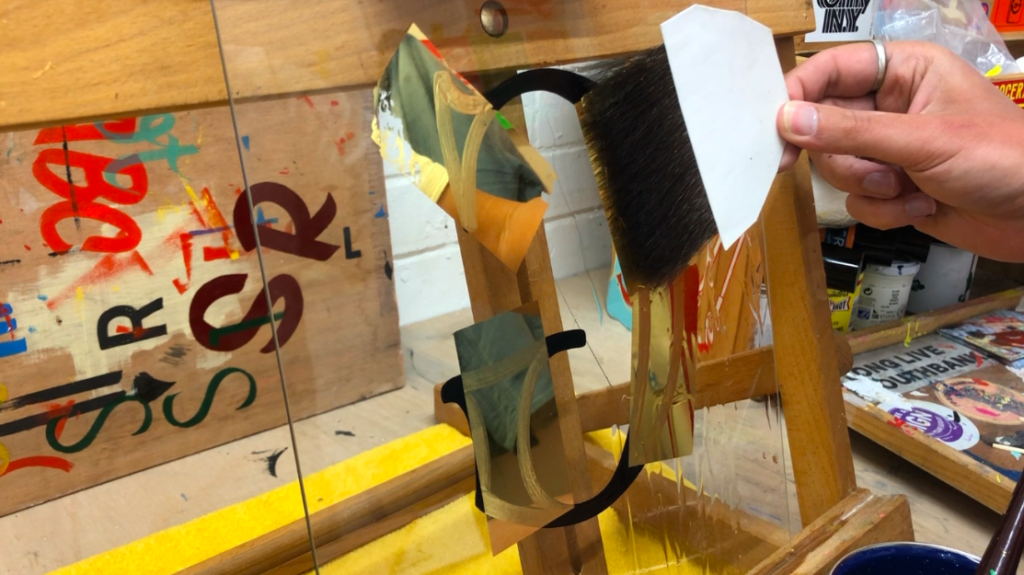
Start by lightly brushing off any loose bits of gold that aren’t stuck down with a soft brush, or a fluffy bit of cotton wool – I turn a cotton pad inside out for this.
Next, take a clean cotton wool pad and gently buff the gold leaf with it. This will take out any minute creases in the leaf and help give a brighter, smoother finish to the gild.
You can apply a little pressure here but too much and you risk scratching the gold leaf.
STEP SIX: Repeat steps 4 & 5
A second gild is done to cover any minor holes or gaps left from the first gild, and to help give a brighter finish. You can check it from the front of the glass to help spot any missed bits that need covering.
STEP SEVEN: Back it up!
Use Nazdar back up paint to paint over the areas of the gild you wish to keep. If your design has outlines like this one, you’ll easily see them under the gold so you can paint within them, overlapping the inside edge a little. If your design does not have outlines, you need to pounce your design backwards onto the gold leaf and follow your pattern. Nazdar tends to dry within 15 – 30 mins, but I normally try to leave it at least an hour to let it harden up as much as possible before cleaning.
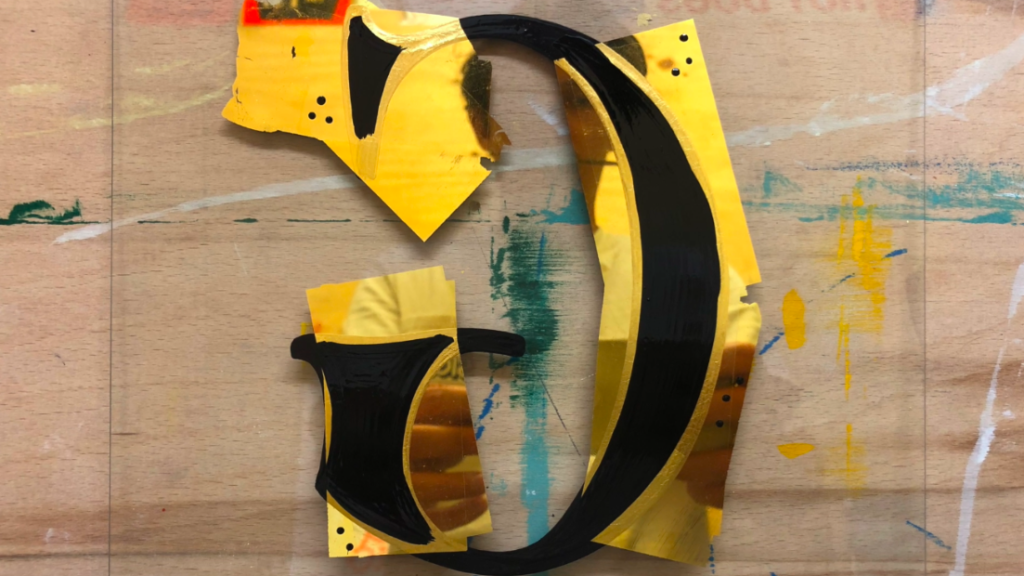
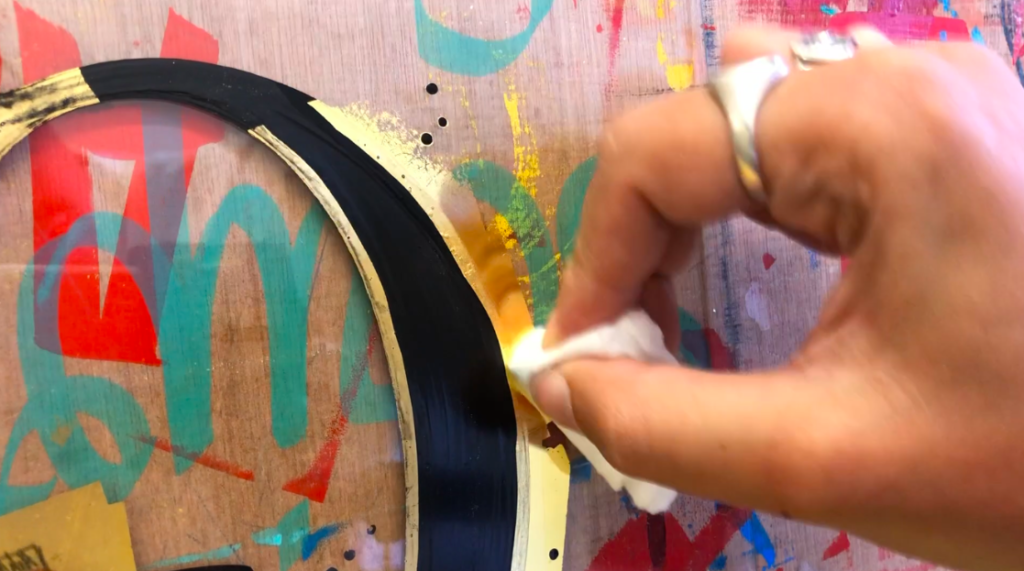
STEP EIGHT: Clean off the excess gold
Use a cotton wool pad with a tiny amount of water and a little of the cleaning powder used to clean the glass earlier. Rub this lightly over the areas of gold you wish to remove, and you’ll start to see it slowly come away. Be careful not to get the glass too wet, as this can cause the outline or backup paint to pull away from the surface and chip.
Use a dry cotton pad as you go to wipe away excess water. Check it from the front to spot any missed areas - small bits of gold left around the outline will give it a slight ‘halo’ effect which will distract from the finished design. Once you’re satisfied you’ve cleaned it all up, give it a final wipe down and you’re good to go!
EXTRA STEP: varnish
If working onsite in someone’s window, you’ll want to protect the gild from regular cleaning and any knocks or scrapes by painting a clear varnish over it. Cover the entire design, with a 1-2mm overlap onto the glass.

All materials needed for reverse glass gilding can be found on the Handover website.
Hooray!
Product added to basket!
