Shell Gold
Published on 13.05.2020 by Rachel
Published on 13.05.2020 by Rachel
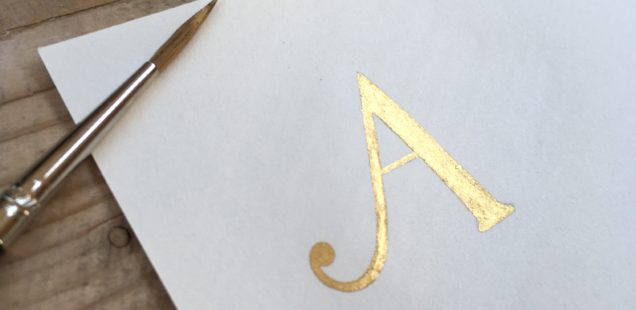
Shell Gold – so called because traditionally it was made and stored in a shallow shell such as a clamshell, is genuine gold, finely ground to a pigment and bound with gum arabic to form a solid watercolour pan.
Shell gold has a number of uses – in painting of religious icons, to paint fine lines, called assiste, on robes etc, in manustcrips as a way to add golden highlights, and it can also be used to touch up small gilded areas.
It is an ideal use for any left over flakes of gold, called skewings, that have been brushed off during gilding projects.
To make your own shell gold you will need:
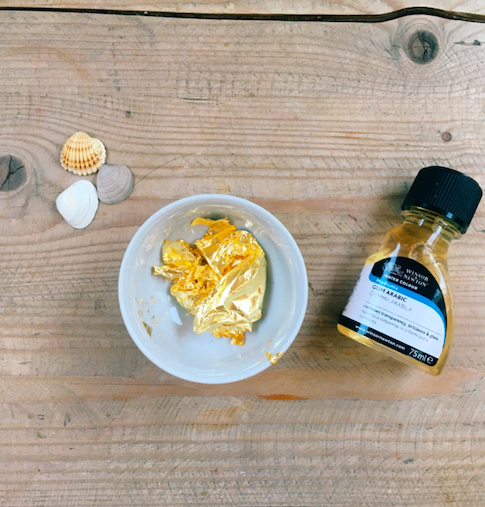
In the bowl add a very small amount of gum arabic (you can use honey here if you wish to create a gold pigment and not have a binder)
A note of caution at this point – from here on your hands will be covered with gold for the next hour or so, leaving to do something else will mean washing your hands and losing precious gold!
Add in the scraps of gold leaf a little at a time and begin tapping them, do not rub them at this point as you may cause them to roll up into balls and it is harder to break them down.
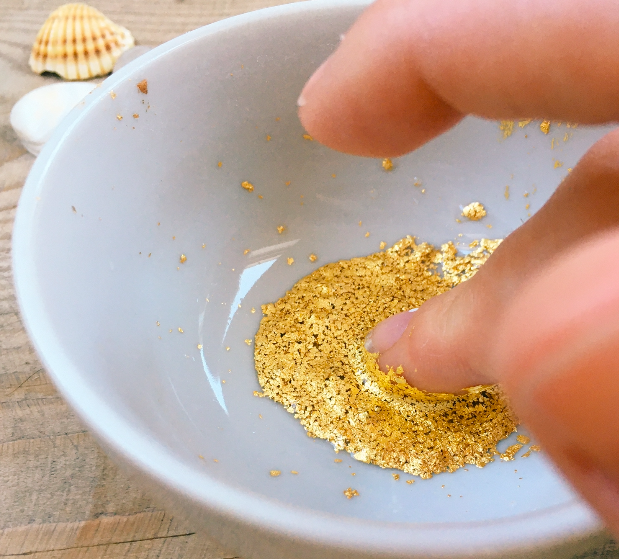
After a short while you can add salt, the salt is used as a grinding agent (during my research I did come across methods that use a pestle and mortar, but I don’t own one, and salt seems more fitting with SHELL gold, so here we are…)
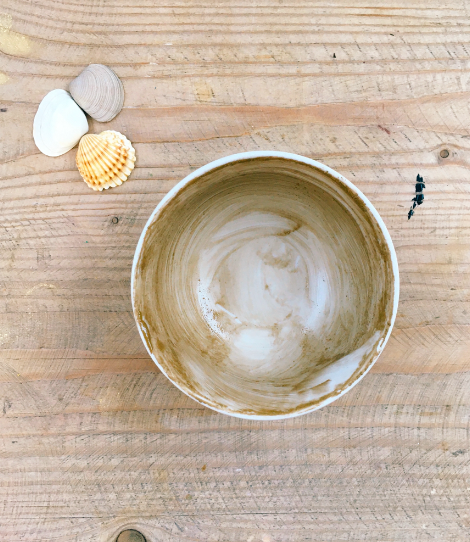
With the addition of the salt you can start to grind the gold around the bowl, adding a little water if the mixture gets too dry. The dipping bowl I used was ideal, try to keep the gold away from the top edge of the dish (something I failed to do)
About 25 minutes of grinding will start to look like this:
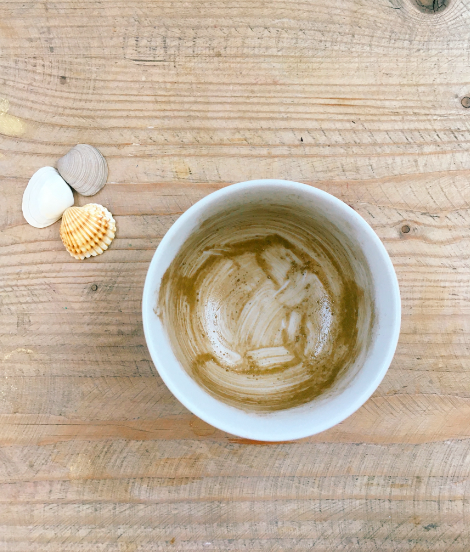
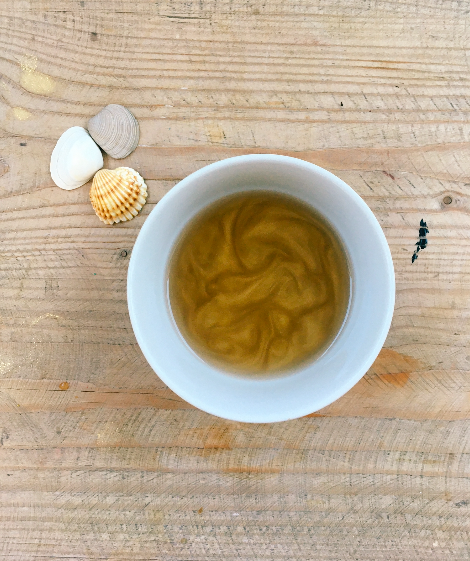
At this point, I added more salt as the majority of it has dissolved. It is very hard to tell when to stop grinding the gold but the longer you go, the finer the pigment, and the nicer the paint. I think 40 minutes is a good minimum for around 3-4 leaves of gold.
After about 45 minutes, and just before I started to question all of my life choices I had this:
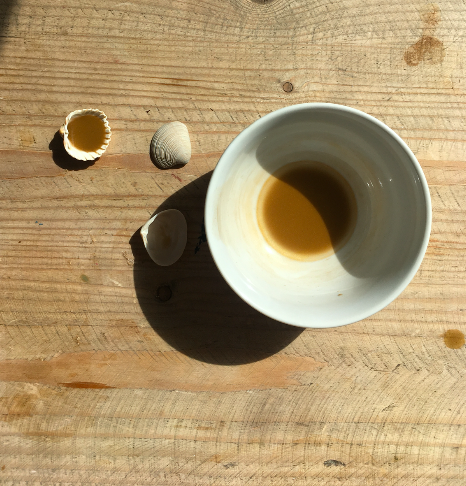
At this point, the gold was more of a paste and felt very smooth. Next is the fun part – washing the gold.
Add distilled water to the bowl, I needed to add quite a lot to catch the gold high up the sides of the bowl and to have it deep enough to wash the gold from my fingers. If you used honey, heat up the water a little before adding to help dissolve the honey.
When the water is added it should look like a lustrous gold ink, if it doesn’t, you have not ground the gold fine enough.
After a few hours, all the gold will settle to the bottom and the water can very carefully be poured away. Repeat this process 3-4 times, you can taste the water, if it still tastes salty you need to keep washing the gold.
Eventually, after numerous washes, you can pour out the majority of the water and decant the gold into shells!
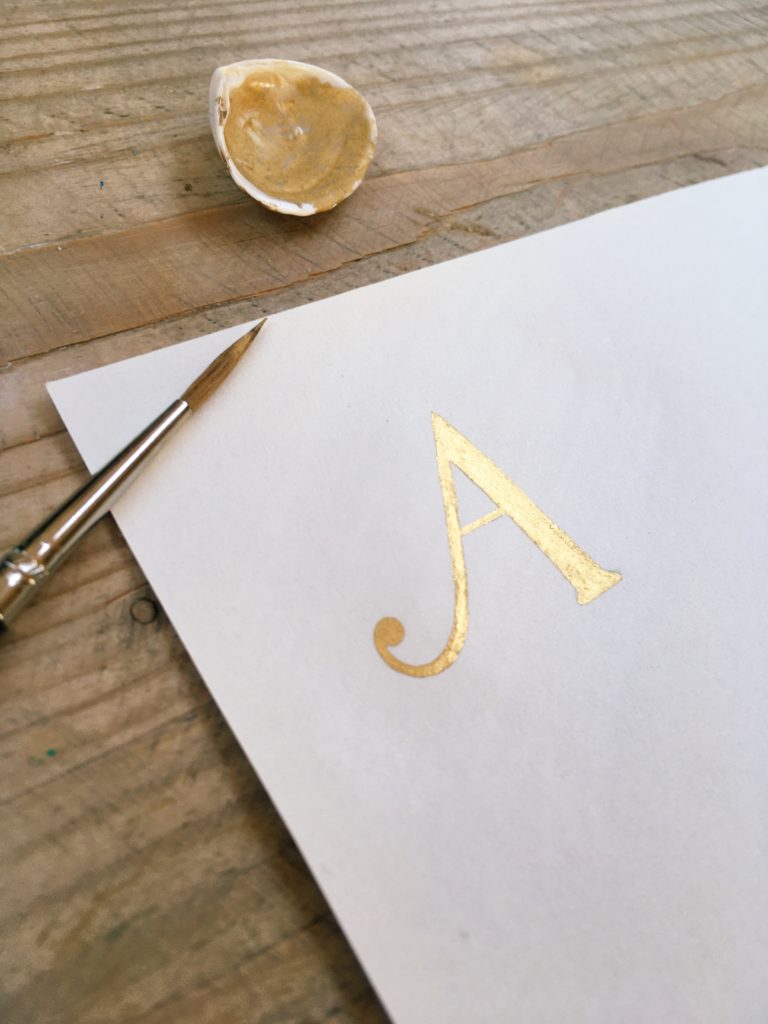
Leave the shells somewhere sunny for the last of the water to evaporate and add a small drop of gum arabic, then your paint is ready to use!
The paint can be used in the same way you would use a watercolour pan, add a small amount of water and use with a soft brush. Initially, the paint will have a matte appearance but once dry it can be burnished to a high shine using an agate burnisher. After using, rinse the brush in a small amount of water and add this back to the shell as not to waste the gold pigment.
Problem solving:
My first attempt with this cracked when burnishing, I put this down to not enough gum arabic. Add just a little if the paint feels too dry and dusty – too little gum arabic and the pigment will brush off the page.
Be careful not to add too much gum arabic though, as if the gold particles are surrounded by too much of it, it may appear a dull brown colour even after burnishing. You may also be left with this result if the gold was not ground finely enough to make delicate fine lines in the painting.
If you don’t fancy making your own, you can buy shell gold here!
Happy painting! Tutorial by Rachel
Hooray!
Product added to basket!
