Mother of Pearl & Abalone Shell on Glass
Published on 27.04.2020 by Rachel
Published on 27.04.2020 by Rachel
This is the first in an exciting series of tutorials and tips led by our customers. The following tutorial was created by The Unlikely Painter, a Glasgow based sign painter and artist who is sharing his method of using mother of pearl and abalone shell on glass.
Tools and Materials Required
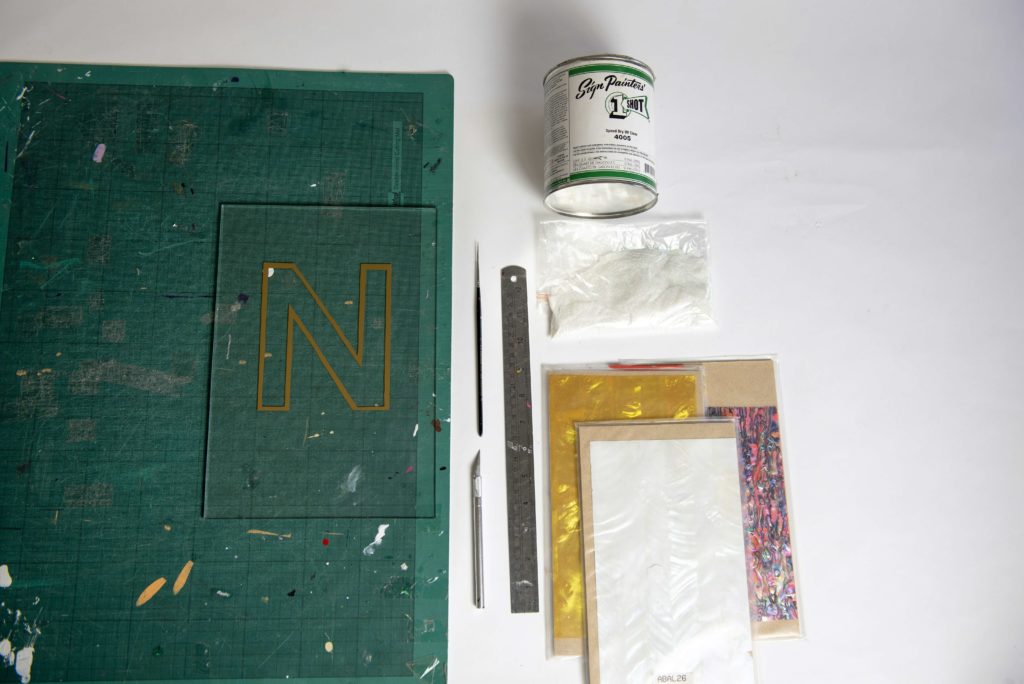
1 x Scalpel
1 x Metal Ruler
1 x Mother of Pearl or Abalone Shell Sheet
1 x Cutting Mat
1 x One Shot Speed Dry UV
1 x Brush (Size 0 used here)
1 x Glitter or Metal Flake if feeling fancy
1 x One Shot or Handover Enamel Paint
1 x White Spirit (for brush cleaning)
1 x Brush Oil
Steps
Having already gilded or painted the outside lines of your letter or piece, make sure your glass is clean before starting, and get your cutting mat, scalpel, ruler, and shell sheet.
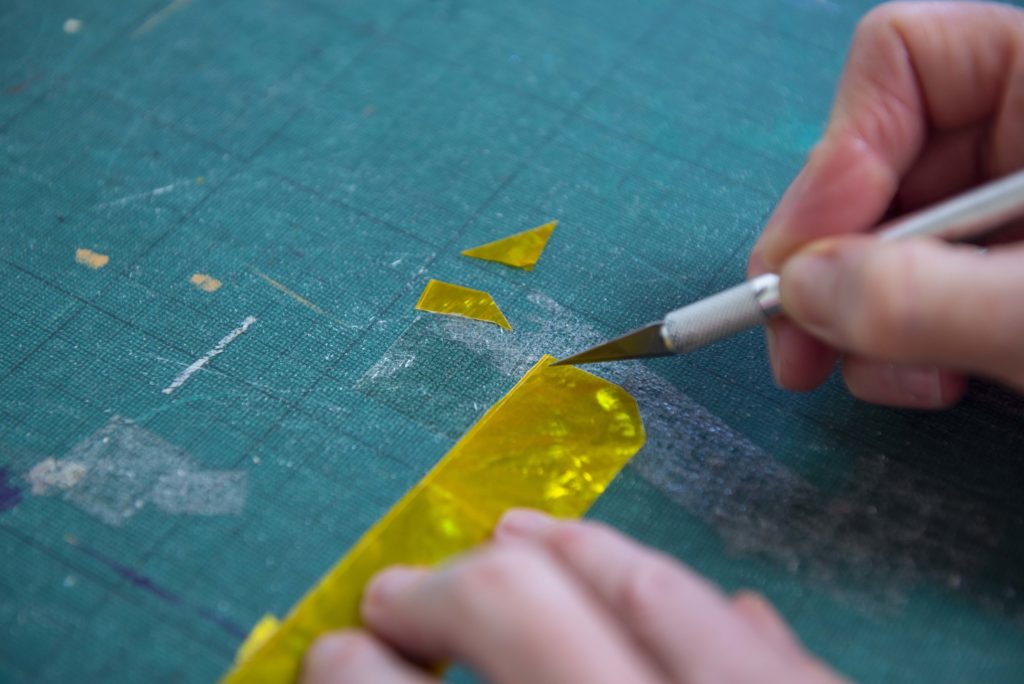
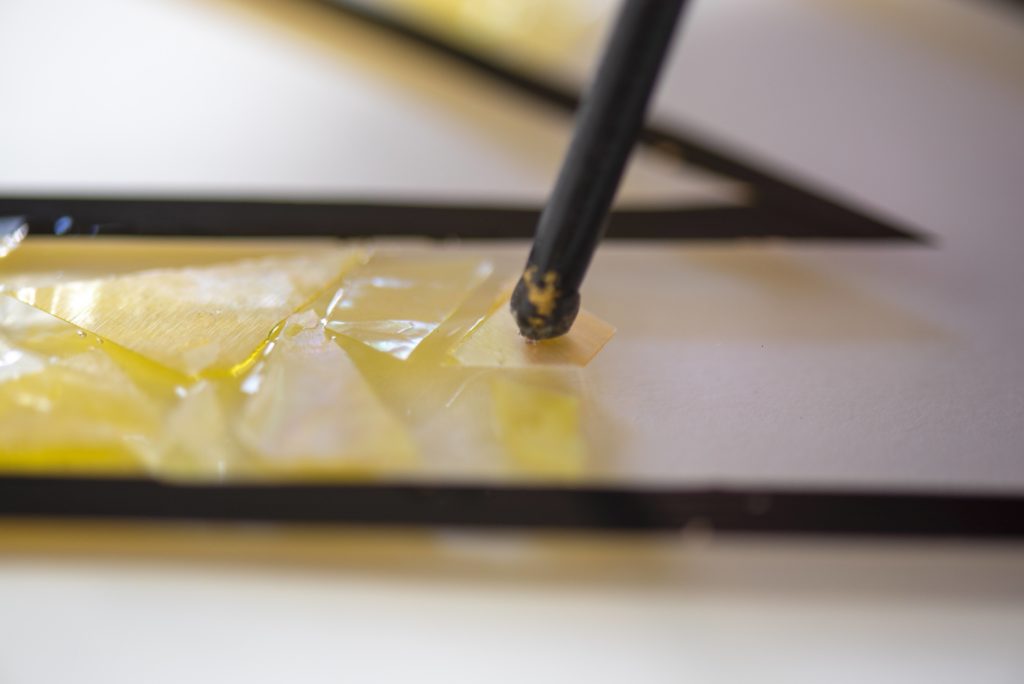
Use your scalpel to cut the shell into the shapes you require, or, if you are looking for a bit of a more rugged shell look, just break the shell with your fingers.
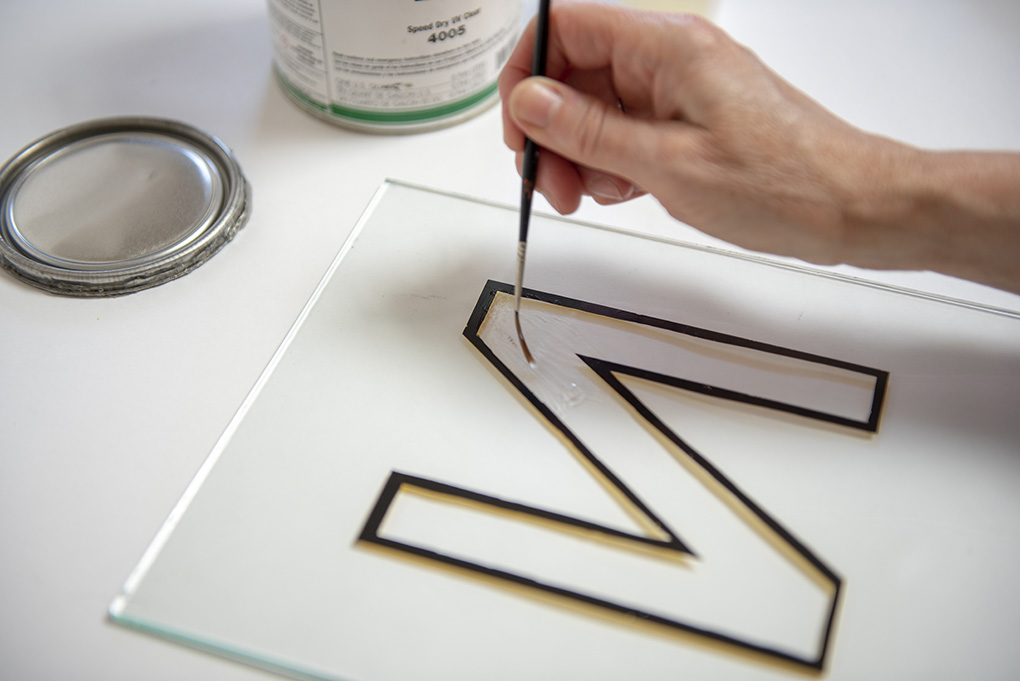
Get your One Shot Speed Dry UV Clear, (make sure you use this in a well-ventilated area) and with your clean brush, paint the area you are going to lay the cut up pieces of MOP (mother of pearl) or abalone shell. I then leave it to carefully tack up for about 5 minutes before starting to lay the pieces of shell. Make sure you clean your brush after using the One Shot Speed Dry UV and oil the brush until using it next.
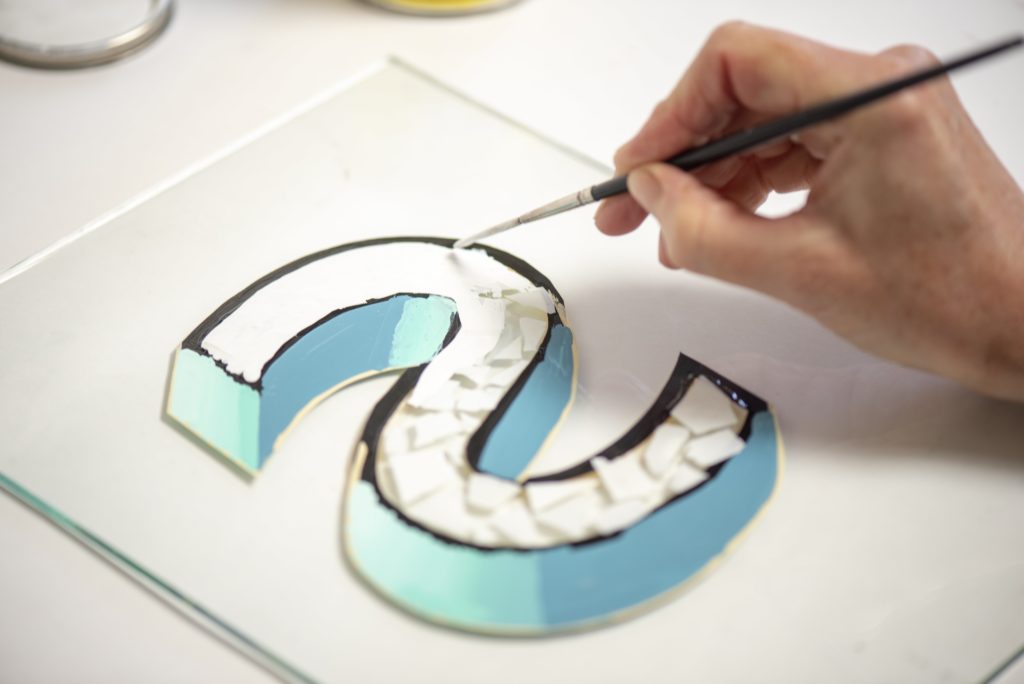
I use the end of the brush with a little bit of the One Shot Speed Dry that has gone tacky to grab the pieces of shell and position them on the glass. Once you have the piece of shell in the right place, press it down onto the glass until it sets in place. Think about how much space you want to leave between each piece. Once in place, I would advise not to try and move it again. If while working any of the One Shot Speed Dry has dried too much and isn’t attaching the shell, just paint on some more and follow the previous steps.
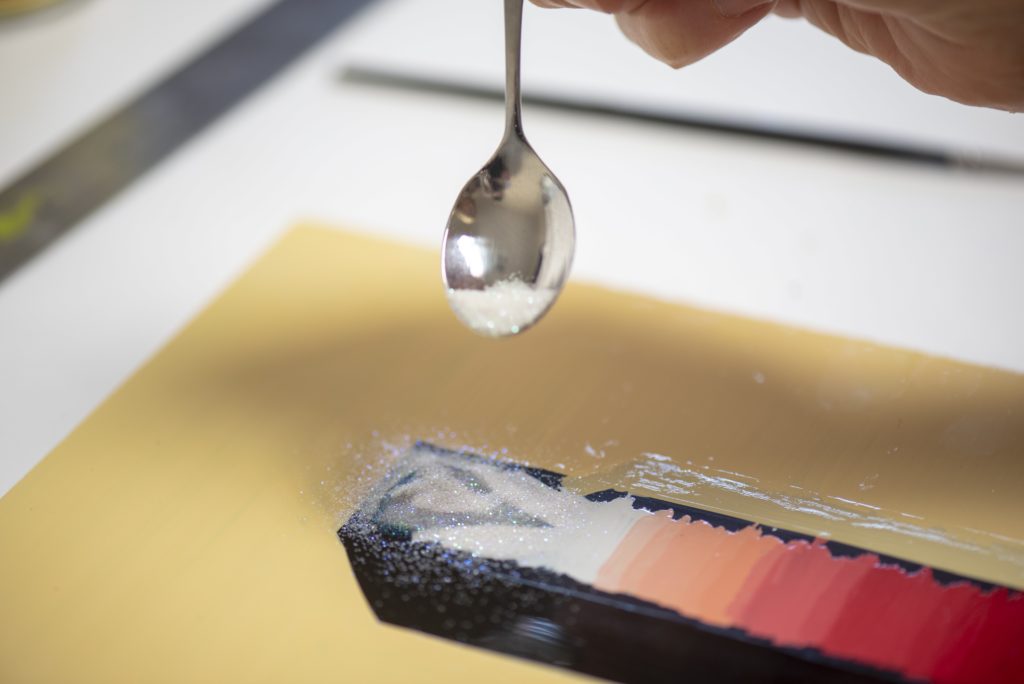
Once you have completed laying all the shell in place, and it has fully dried, get your clean brush, and paint over all the shell with the One Shot Speed Dry UV again, making sure you seal the edges of the shell with it (this will prevent the paint seeping in front of the shell at a later stage). Once finished, let it fully dry again before moving onto the next step – although if you are backing up these pieces of shell with some glitter or metal flake you can sprinkle it on at this stage while the One Shot Speed Dry is still tacky.
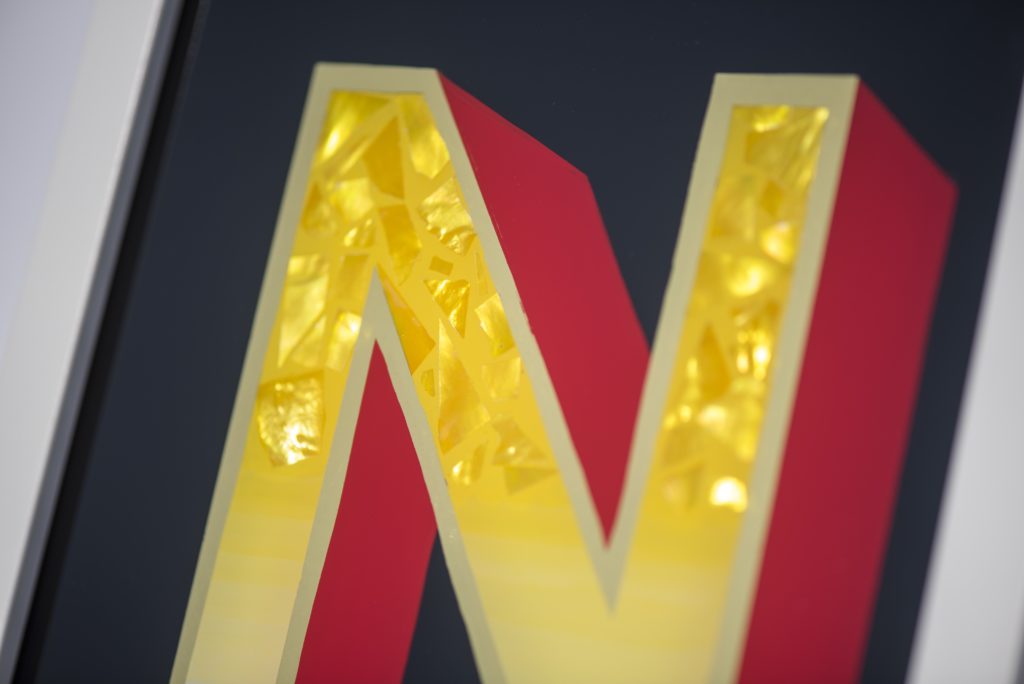
Once fully dry again it is time to get your oil-based enamel. Paint over the back of the letter, including the shell and all the spaces between.
That’s you finished now, and ready to move onto adding the finishing touches to your piece, and getting it one step closer to your wall to enjoy!
Shop A.S Handover for all materials required to make your own!
Hooray!
Product added to basket!
